안드로이드 편에 이어 iOS 푸시 알림 개발 방법에 대해 알아보겠습니다. 역시 FCM을 사용해서 개발합니다. 개발 순서를 보시고 빠진게 없나 살펴보신 후 그 아래 개발 방법을 하나씩 따라해보시면 됩니다.
[개발 순서]
1. iOS 권한 요청 코드 추가(백그라운드, 포어그라운드)
2. Xcode Capability에 기능 등록(Push Notification, Background Modes)
3. 식별자(Identifier) 등록 및 push notification 기능 설정
4. APNS 키 발급 및 등록
Flutter iOS앱을 생성 및 설정하는 부분과과
애플 계정에서 인증서를 등록하는 부분과
Xcode Signing을 위한 프로비저닝은 되어있다고 전제한 후 진행합니다.
[구현 방법]
1. iOS 권한 요청 코드 추가
안드로이드 편(1편) 에서도 설명했는데
아래와 같이 백그라운드랑 포어그라운드 알림 요청을 하면된다.
Future<void> setFCM() async {
NotificationSettings settings = await FirebaseMessaging.instance.requestPermission(
alert: true,
badge: true,
provisional: false,
sound: true,
);
// iOS foreground notification 권한
await FirebaseMessaging.instance.setForegroundNotificationPresentationOptions(
alert: true,
badge: true,
sound: true,
);
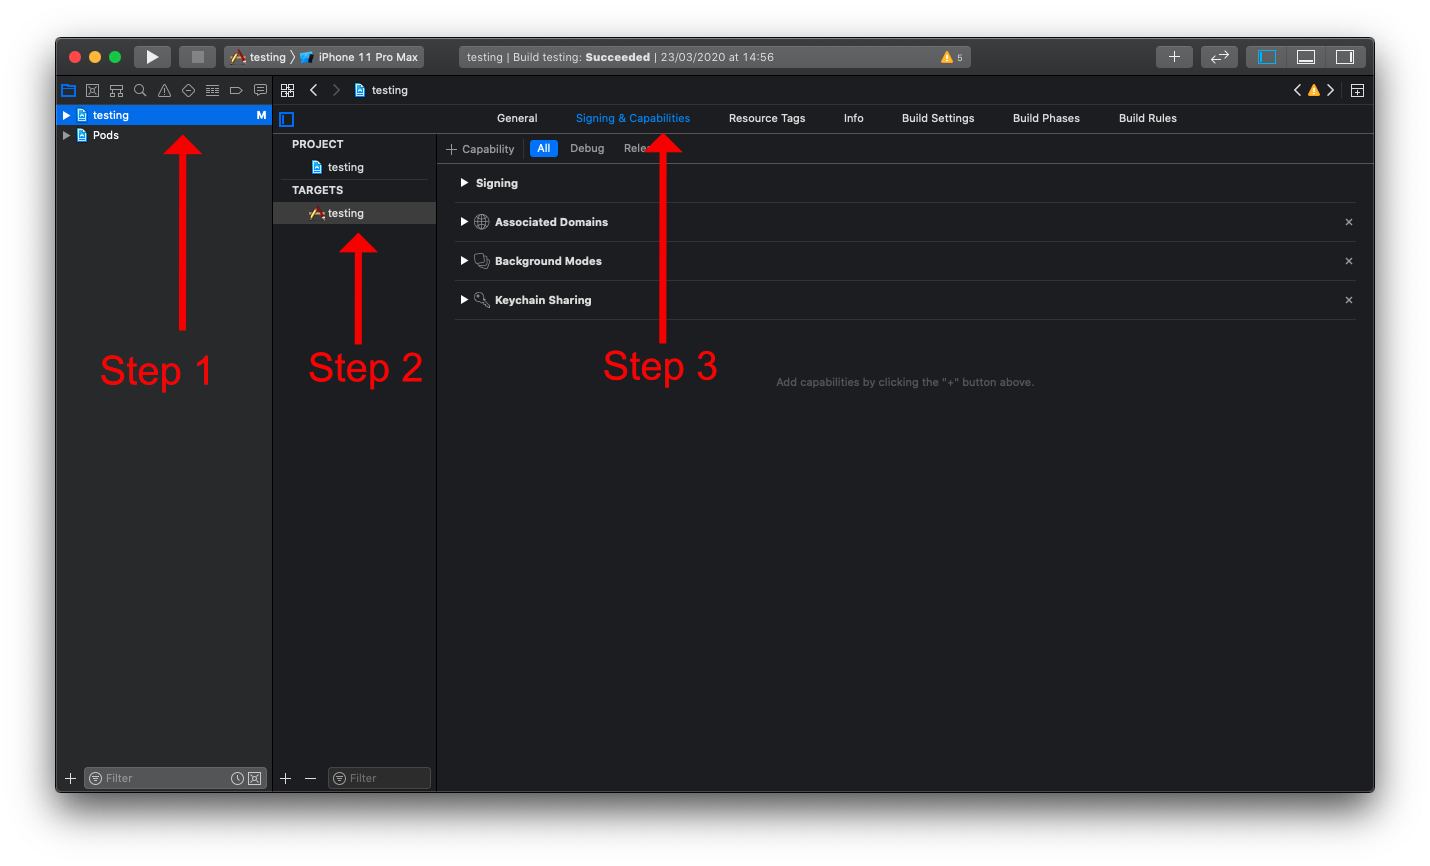
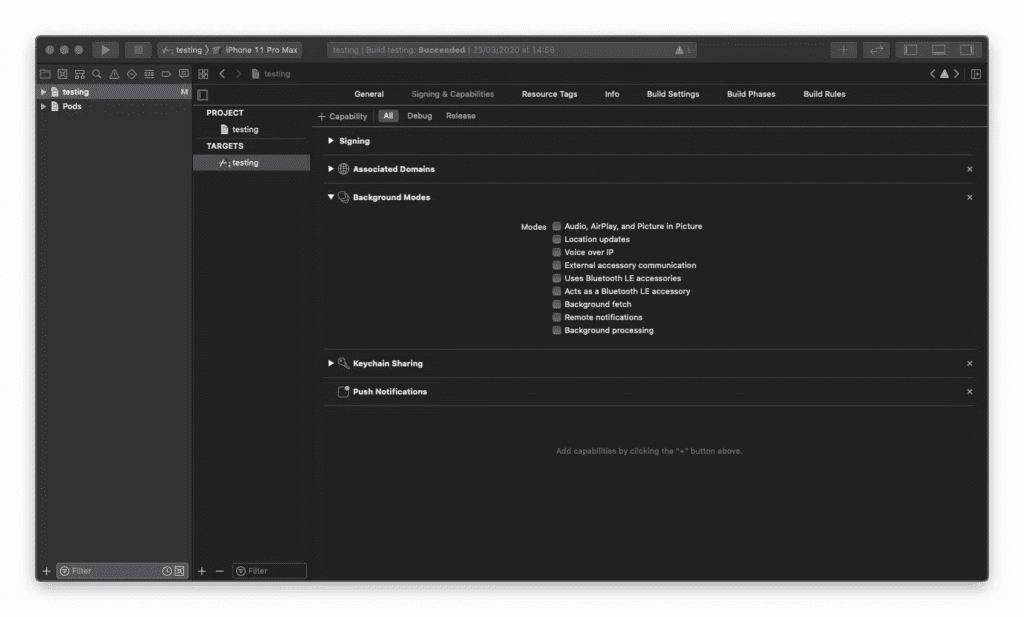
}2. Xcode Capability에 기능 등록(Push Notification, Background Modes)
아래 순서대로 클릭후 +Capability를 클릭한다.
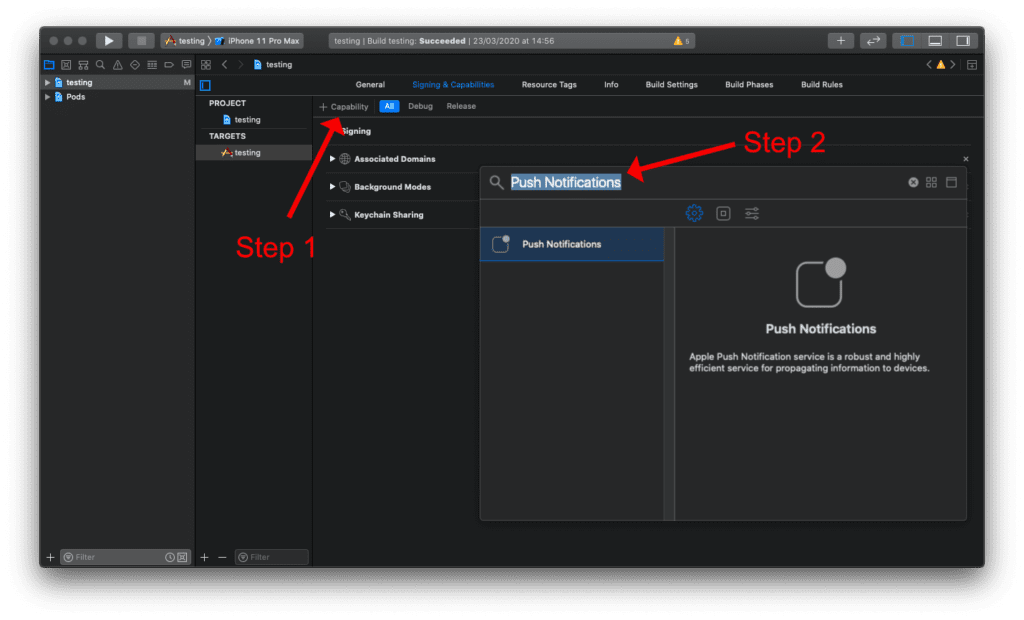
+Capability 를 누른 후 Push Notifications를 추가한다.
+Capability 를 누른 후 Background Modes를 추가한다.
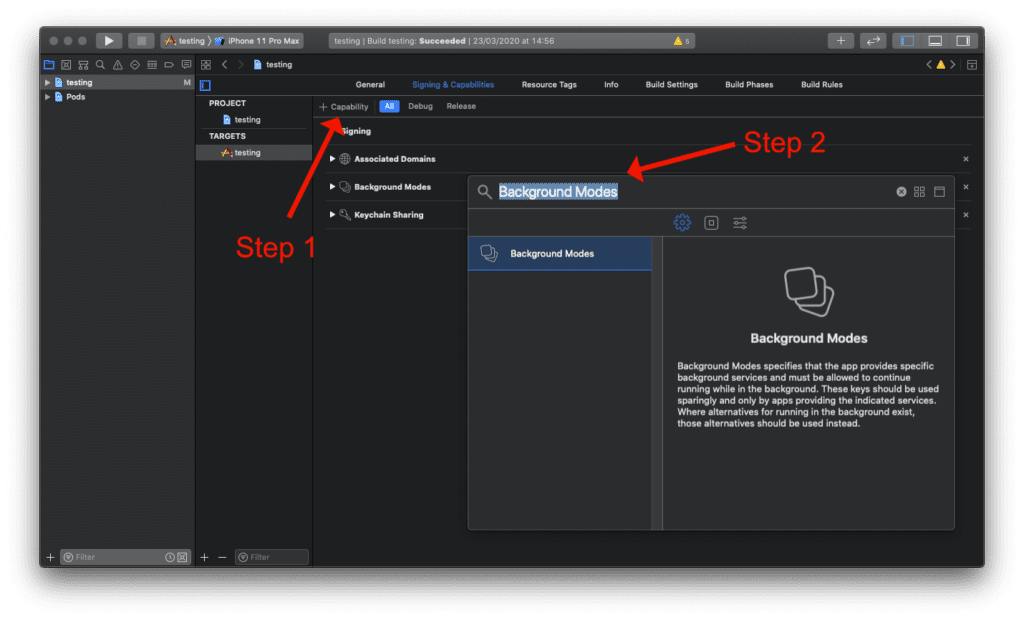
Background Modes에서 Background fetch 와 Remote notifications 체크한다.
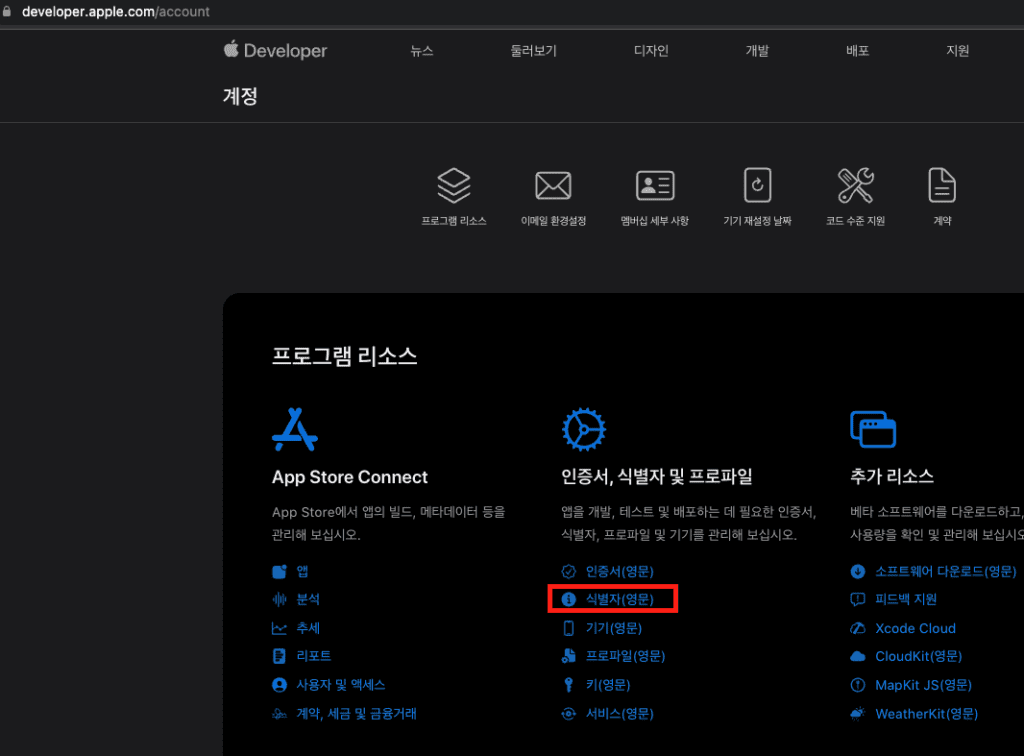
3. 식별자(Identifier) 등록 및 push notification 기능 설정
아래 링크로 들어가서 식별자(영문)을 클릭한다.
로그인 – Apple
Copyright © 2023 Apple Inc. 모든 권리 보유. 개인정보 처리방침 사용 약관
developers.apple.com
+ 버튼을 누른다.

App IDs를 누르고 Continue를 누른다.

bundle ID애 iOS 앱의 bundle id를 등록하고 description도 입력한다.

그리고 아래로 스크롤을 내려서 Push Notifications를 체크하고 Save를 누른다.

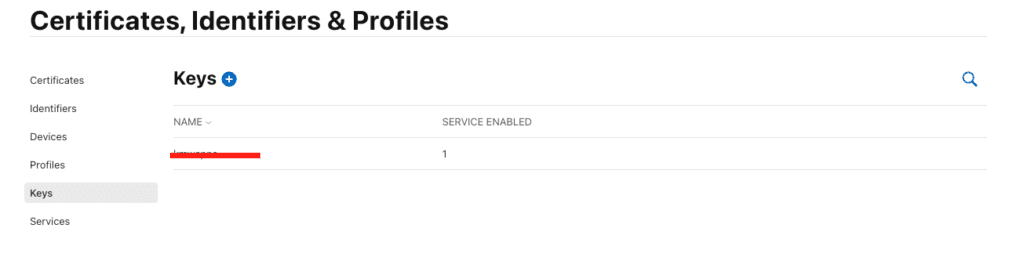
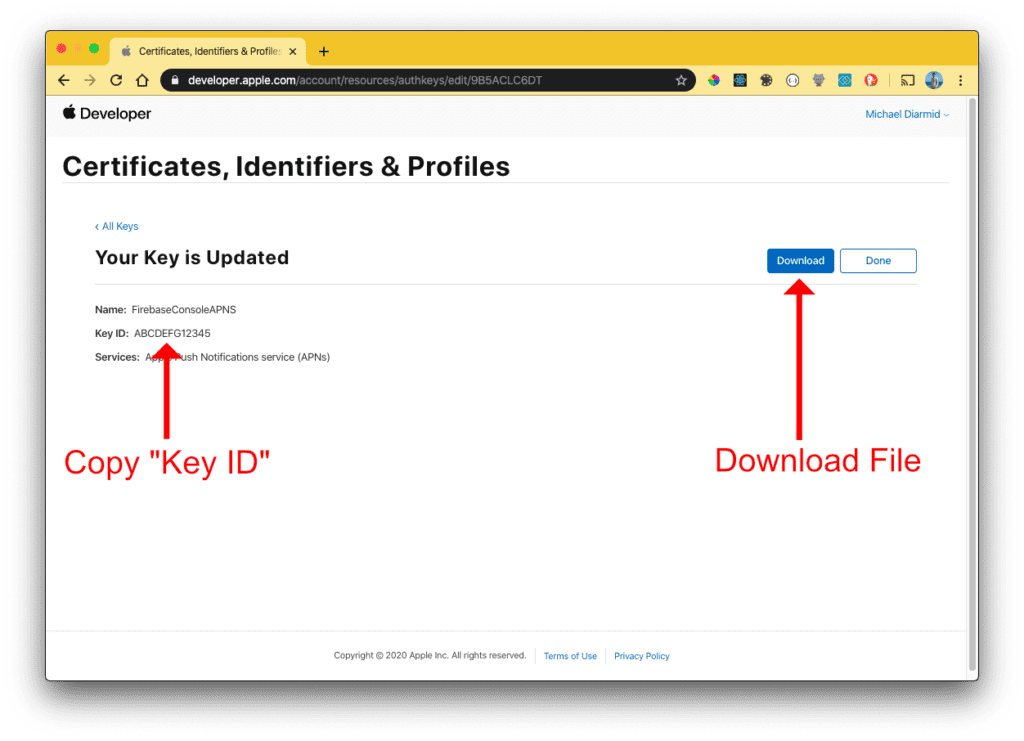
4. APNS 키 발급 및 등록
사이드 바에서 Keys를 클릭 한후 +버튼을 누른다.
키이름을 정해서 입력하고
APNSs를 체크하고 Continue를 누른다.
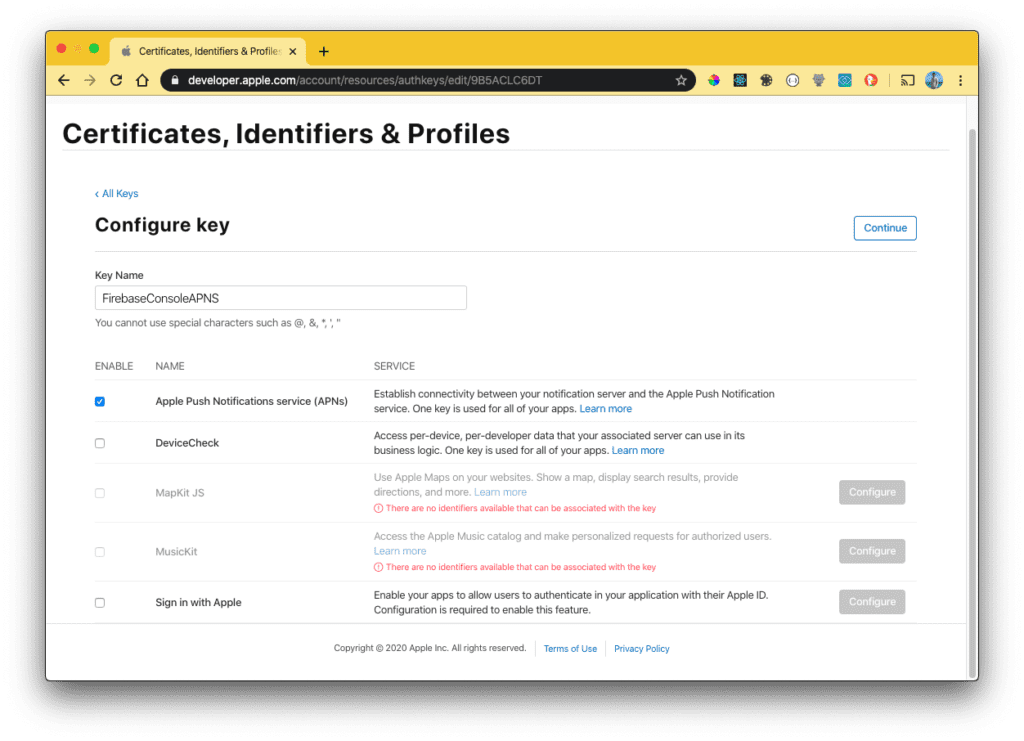
Key ID를 카피한 후 Download를 한다.
주의할점은 키는 다시 다운로드할 수 없으니까 꼭 키를 안전한 곳에 백업해 두자.
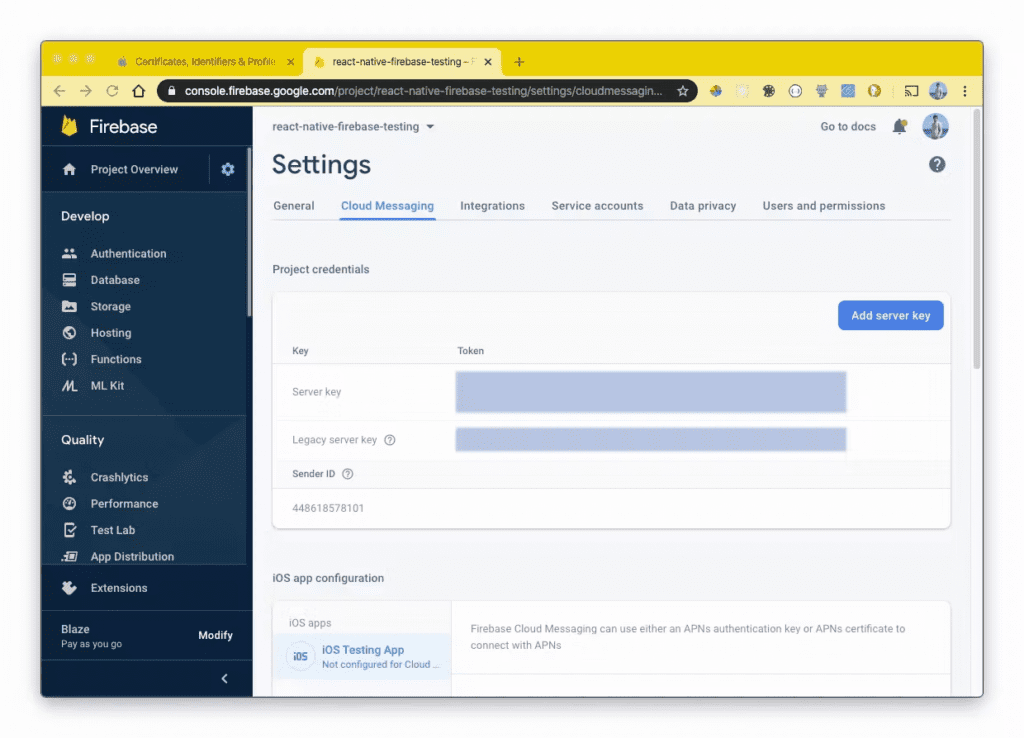
파이어베이스 콘솔의 설정에서 iOS 앱을 클릭 한후
아래와 같이 Upload버튼을 누르고
위에서 복사한 Key Id를 복사한후
다운로드한 APNS 키를 업로드한다.